
Hiking Kjeragbolten
When we started planning our travel to Norway it was a no-brainer that it was going to include trekking of some kind and hiking Kjeragbolten was one of three must do hikes in Norway. The scenery is AMAZING!! The  drives through the mountains, their tunnels, the wildlife to the amazing blues of the fjords, it is simply beautiful.
Sometimes when you have wanted to go somewhere for so long, when you get there it does not live up to your expectations. This. is. NOT. Norway!
Finding wild camps in Norway is not difficult we use two Apps/Sites Searchforsites and Camper Contact (Motorhome Parkings). Both we have found to be fantastic.
We did all 3 famous Norway hikes in 5 days, WITH a 10 year old daughter. It is important to note that we are on a roadtrip for 5 months in a campervan, details of where we stayed and a week by week wrap are on our blog if you are planning a similar adventure.
When did we visit
Summer, July 2018.
You can watch Youtube clip here Hiking Kjeragbolten
Getting to Kjeragbolten
 The drive into Kjeragbolten is stunning. Our camp was an hour from the starting point as we had read that there was no camping (self contained or otherwise) closer.
Contrary to many reports we had read and youtube videos we watched, there were people camped up to 5km before the hike (we came from Oslo going West, through Notodden…Nomelamb…).
By arriving early on the day of the hike the drive to the starting point was incredible, that time of morning even more so. The sun slowly rising, the mountains, the still lakes with mirror image reflections, it is absolutely glorious.
Another benefit of the early start there was limited traffic on the road. Like most of the roads they are narrow and there are passing bays provided at irregular intervals. This can make the journey a lot longer in busy times.
Parking
200Kr per day per vehicle. You can pay by cash or credit card on arrival. There was a generous amount of parking available but can only imagine how quickly this fills.
How long should I allow
5 hours, we completed the hike in less but as we left early we did not have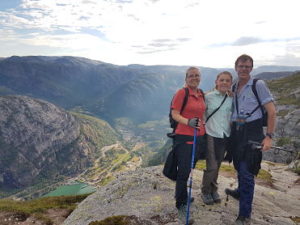 hold ups on the trail by volume of people, sharing of chains, wait times around narrow or rocky areas until returning.
The later in the day you go, the longer it will take due to waiting for your turn for photos at the top. We had little to no wait.
4.8km each way, a total of 9.6km
How long did it take Us
We started our climb at 6:45am and returned to the carpark at 11:15am.
By arriving early before tour buses not only is there parking, you will not have the long wait for photos at the top! VERY worthwhile. Also, the mornings are cooler and it is more pleasant to walk at your own pace not being stuck behind others (maybe less experienced hikers, anxious of the heights and not equipped with the proper hiking footwear).
What did we think
 It is a very physical hike due to its gradient and multiple rock climb areas. The length of the walk is not an issue, the scenery absolutely amazing. Proper footwear is a necessity. This climb would require extreme caution in wet weather, due to very slippery rock faces.
The earlier you arrive at the Nesatind – the suspended rock, will mean the less wind. Therefore, the earlier you leave to begin the hike, the better.
For the first 2 kilometres walking sticks were a pain in the bum, due to the physicality of the climb so if we were to do it again we would not bother with the hiking sticks. (Miss B & Mum have hiking sticks).
Lots of photos taken and as the sun came up and the light changed across the mountains it

just got better and better.
Miss B who was 10 at the time handled this climb well, she loved that she got to use her hands and feet for climbing in parts.
Jumping out on the rock, a suspended rock, 1000m above the fjord was an amazing adrenaline pumping experience – DON’T LOOK DOWN.

There is a small skinny ledge that leads around the larger boulders to the suspended rock itself.
Also, there is a larger ledge to the side where you can stop and have a bite to eat and enjoy the scenery (from a great vantage point) before commencing your descent.
On arriving at the car park we immediately removed our hiking boots and two pairs of socks to allow them to air and dry ready for tomorrows hike (there is only so many pairs of hiking socks you can take with you!)
Water
There was parts of the walk you could have got access to water. In small streams (nearer the beginning) and we had our lifestraw water bottle to fill up. We also also took 3 litres of water as we did not know this prior to leaving. This was ample in the conditions we had for our hike.
Where did we go after
Headed down the mountain in Betsy (the Campervan). The tourist ferry, which was

actually fantastic, but at a cost of 1300kr (Campervan + 2A and 1C) we were a little shocked. There was an alternative route (which we discuss on the youtube video) that if we had of known before leaving Kjeragbolten we could of taken.
By taking the ferry from Lysebotn to Forsand we got to see not only Kjeragbolten from the Fjord but also Preikestolen! What a bonus!
We camped at Forsand and this put us extremely close to our next hike… Preikestolen.
Cake and Eat it 3 is an Australian fulltime travelling family. You can follow our adventures on Facebook, Instagram, youtube and lots of helpful advice and educational resources on our blog at www.cakeandeatit3.com
![]()
Comment here